To Configure Program Aliases in a JES Region Startup File
The aliases to be used by a region are defined in the region start-up file. The
Enterprise Server for .NET Administration UI is used to view these definitions. You can add additional entries to this list, or change existing entries so that your own
programs are used instead of the
Enterprise Server for .NET defaults. To do this:
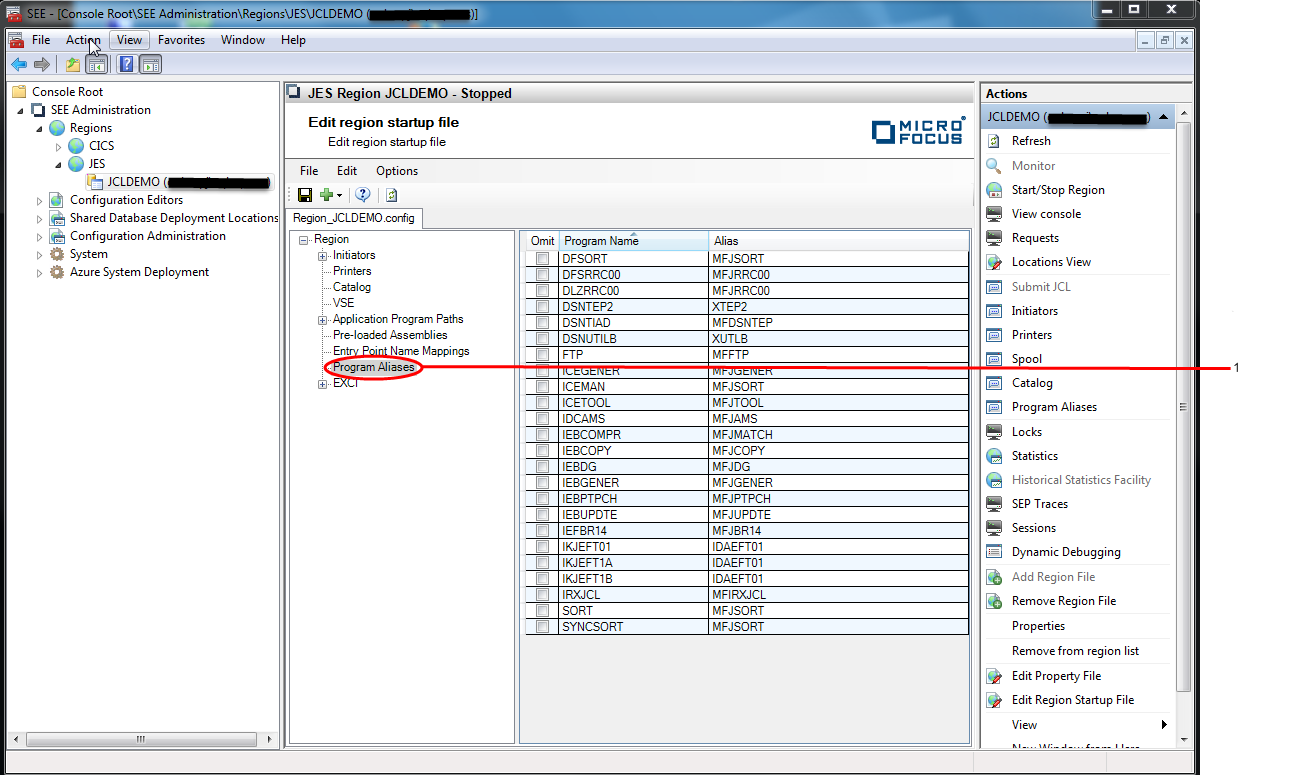
- Open the startup file of the JES region you are configuring, with the Region Startup File editor. See To Edit a JES Regions Configuration.
-
In the
Results pane, expand the
Region node and select the
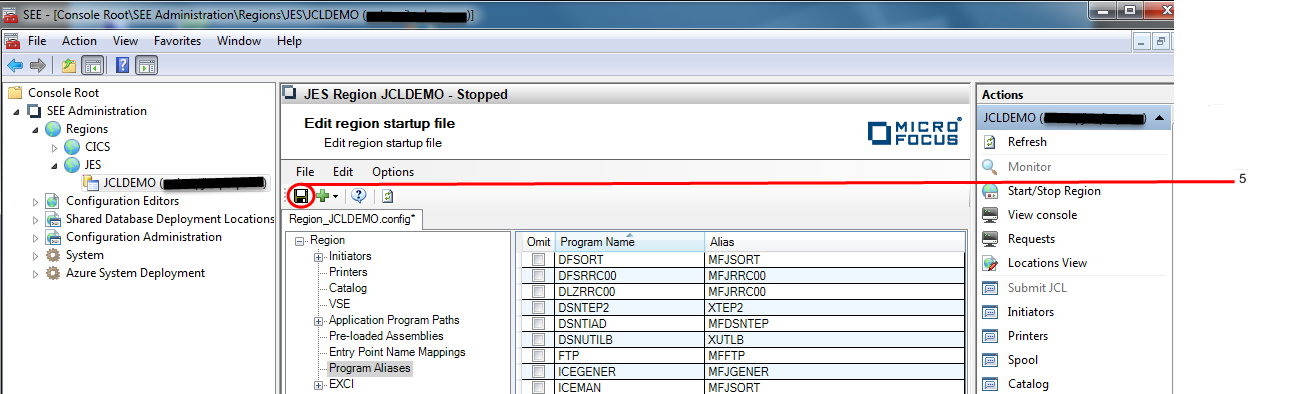
Program Aliases node. See number 1 in the diagram below.
A window is displayed, showing the program aliases already configured for the region.
-
To change the name of the program aliased to a mainframe utility, double-click the alias name and enter the name of the program
that you want it to be aliased to instead. See number 2 in the diagram below. For example, to change the alias for the IDCAMS
utility from the default MFJAMS to MYAMS:
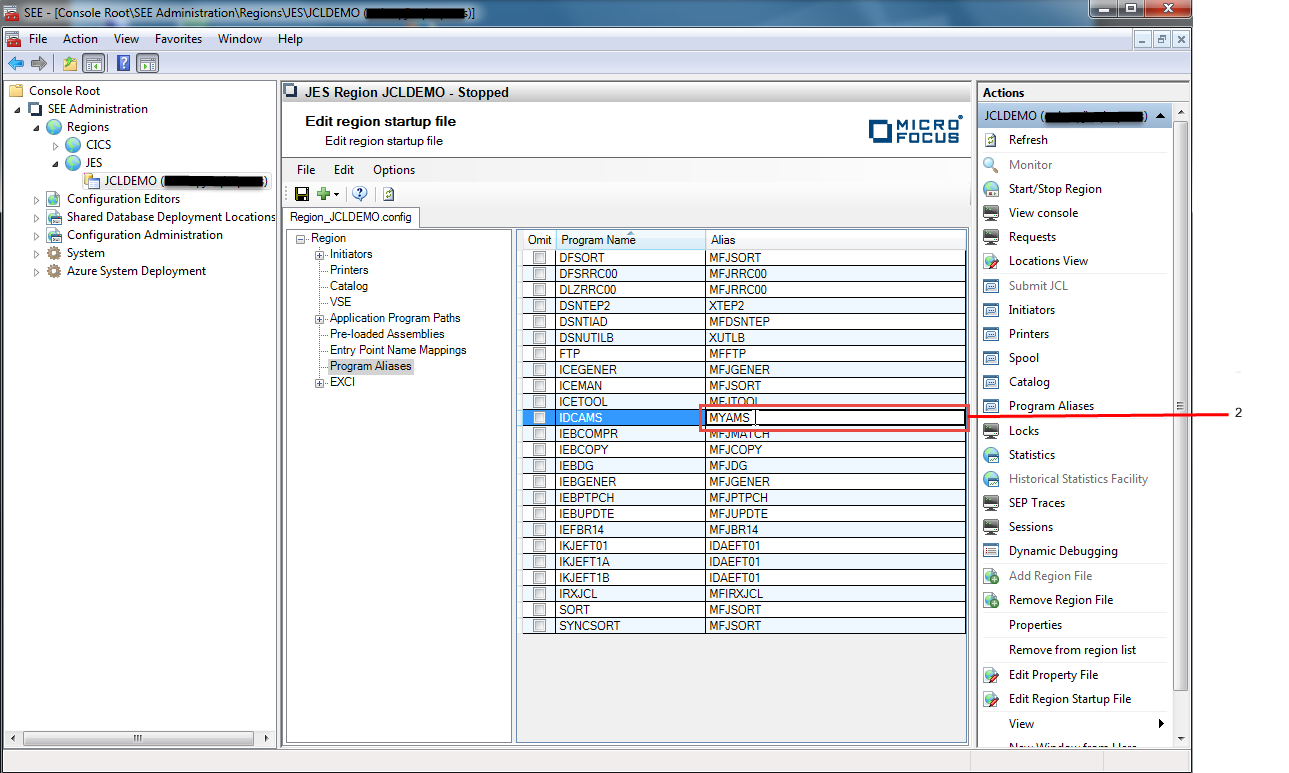 Clicking away from the alias name in the grid will update its value.
-
To add a new program/alias definition:
-
Click
Add Program Alias. See number 3 in the diagram below.
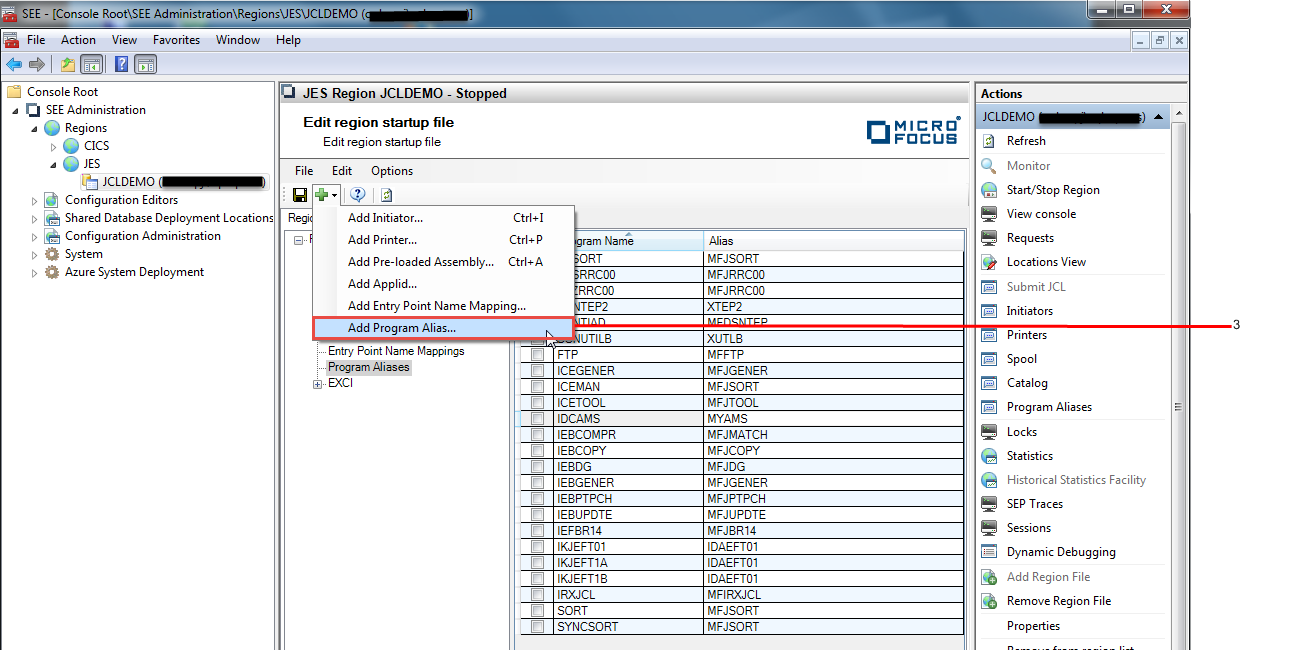 The
Define Program Alias dialog is displayed.
The
Define Program Alias dialog is displayed.
-
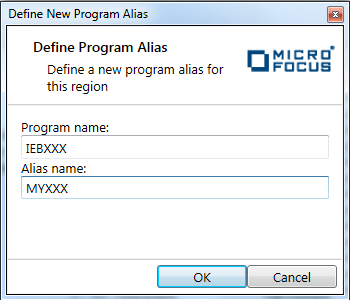
Enter the name of the utility program that you are defining in the
Program name field, and the name of the program that it is to be aliased to in the
Alias name field.
-
Click
OK to dismiss the
Define Program Alias dialog and complete the creation of the definition. The newly created definition will now be displayed in the
Results pane. See number 4 in the diagram below.

-
Click
Add Program Alias. See number 3 in the diagram below.
-
You can remove a program/alias pair that you have added by selecting the item in the grid and clicking the
delete key.
Note: System definitions cannot be deleted from a region start-up definition, so if you do not want one defined for the region, select the item in the grid and check the Omit column.
-
Choose, or click the
Save icon in the toolbar to save the file. See number 5 in the diagram below.
You must cold-start the region for the changes to take effect.